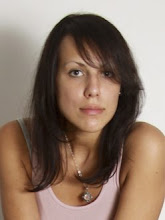
This is my process for painting a portrait from a photo. I always follow this formula, and it works best for me.
First, make sure you have an excellent photo reference. If your reference is not good, you will struggle and it will show in your painting. It's also important to remember that a photograph is the camera's interpretation of reality and things aren't always what they seem. Your knowledge and understanding of light, shadow and color should compensate for what the photo lacks. When in doubt, ask your model to pose again and do some life studies.
My photo reference was actually a candid shot of my husband, and at the time I didn't think to check it well, so I found myself going back to get better reference and I worked with the sledge hammer in my studio.
Also, please forgive the quality of these images, I took them while I was in the middle of working and i usually had paint all over my hands. Click on the image to view its full size.

Once I get a very accurate drawing on the canvas (I draw very tightly with pencil) I go back and ink the whole drawing. This way, I don't have to worry about losing my original lines if I mess up and have to use a cheese cloth to wipe away some paint.
Then, I cover the canvas in a wash of galkyd and burnt umber. Galkyd is a fast drying painting medium. It works better than liquin for this step because it's more fluid--not as sticky, and I love the smooth surface it leaves upon drying. Once the entire canvas is covered, I go back with a cheese cloth and rub out the highlights and lighter values. You can get as detailed as you want with this step using a paintbrush and more paint. I usually just like to get the rough values down. The painting may need a full day to dry at this point.

When adding color, the most important thing is to first establish your true lights and darks. Work on the painting as a whole, in layers, always thinking about how one area relates to the next. Finally, I block in large areas of color before I add the more refined details.

Here is a close up of the first stage of the face. Again, it's important to block in lights and darks and get the flesh tones right before developing final details.
I hope you find this information helpful. Feel free to email me with any questions at
monicakjf@yahoo.comSee my next post for the final painting.


